Configuring Internet Information Server 5.0
Changing the TCP Port on the
Default Web Site
Testing your MS Internet
Information Server
Configuring FrontPage Extensions
Creating a New Web using Host Headers
Testing the Host Header Web
Site
Configuring the SMTP Mail Pass
Through
Configuring the District
Public FTP Site
Configuring the Staff Web FTP
Site
In Chapter 6 you will configure your web sites within
IIS. These web sites will hold the web
data for each school and be accessible by anyone with access to the
Internet. Once you have created the
web sites, you will then configure the web site with FrontPage server
extensions. FrontPage extensions will
allow the web sites to be accessed for editing by FrontPage. Additionally the FrontPage extended web may
be edited using Word, Publisher, and PowerPoint through Web Folders. Next, you will configure SMTP Mail services
on your web server. SMTP services will
allow your web server to send information gathered in a web-base form directly
to an individual via email or to a database.
Finally, you will configure your web server’s FTP service. This service will provide a location for
users to obtain public files from your server or the FTP site will allow your
web master to publish information to a web site.
Materials needed in this chapter
q
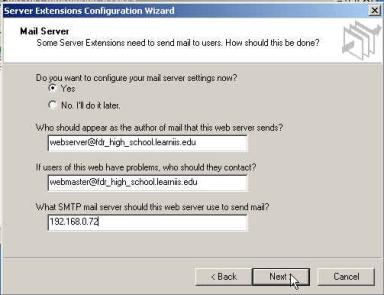
No additional materials are needed
|
|
Configuring Internet Information Server
5.0
|
|
|
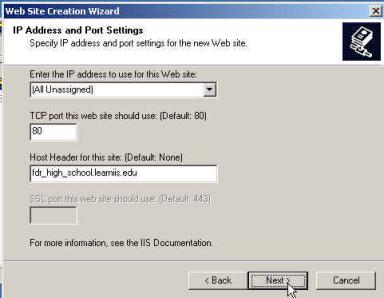
|
|
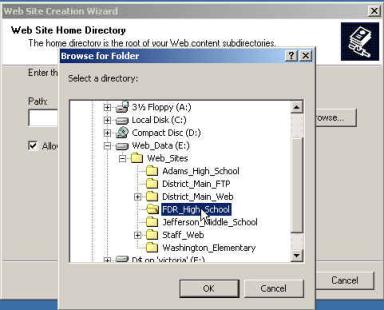
|
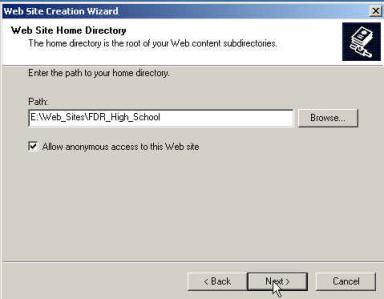
Follow the instructions below to configure Internet Information Server 5.0 on your Windows 2000 Server. Note: You must log into the server as the administrator.
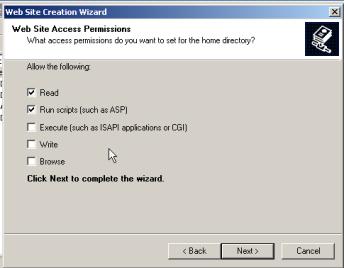
|
|
|
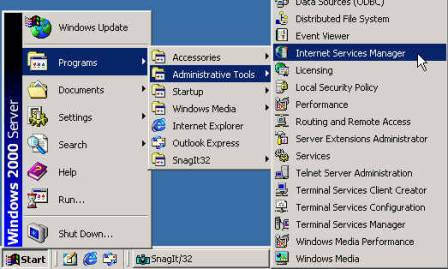
1.
Click Start, choose Programs, Administrative
Tools, and click Internet Services Manager. |
|
|
|
|
|
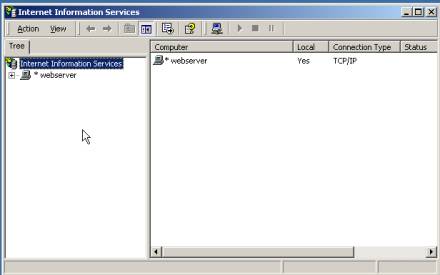
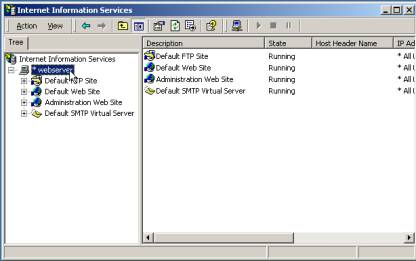
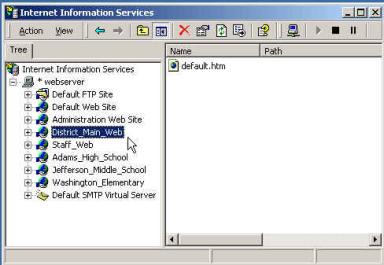
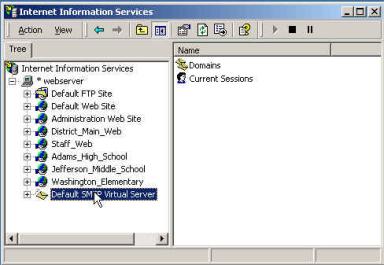
2.
Internet Information Service window: Click the plus sign to the left of
*webserver. |
|
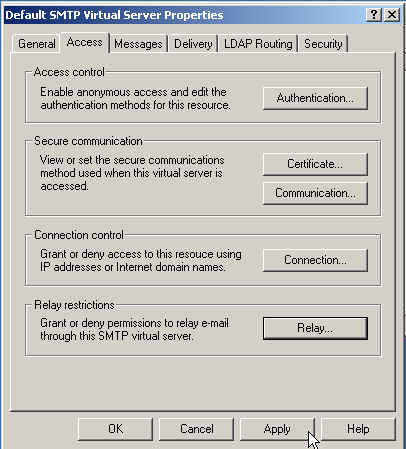
|
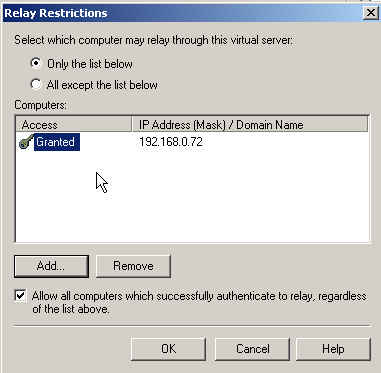
|
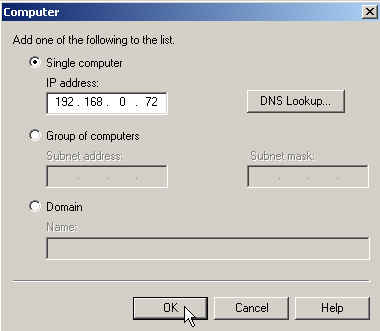
|
|
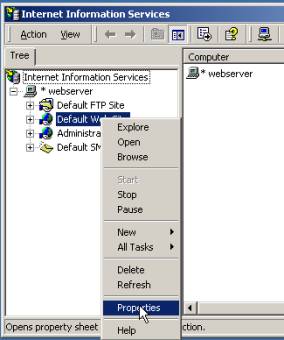
3.
Internet Information Service window: Place the mouse over Default Web Site,
click the right mouse button. Choose Properties. |
|
|
|
Changing the TCP Port on the Default Web Site |
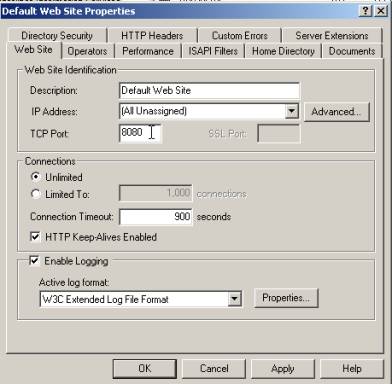
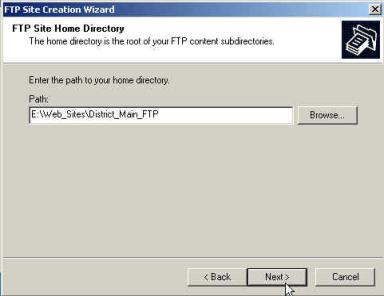
4.
Default Web Site Properties window:
Change the TCP Port: from 80 to 8080. Click Apply. Click Ok |
|
|
|
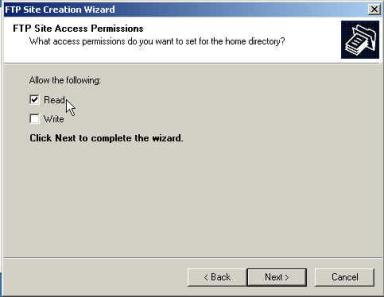
Creating a New Web Site |
5.
Internet Information Service window: This window will now display on the
screen. |
|
|
|
|
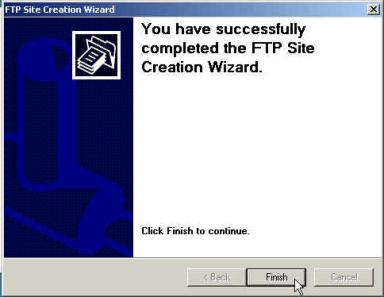
|
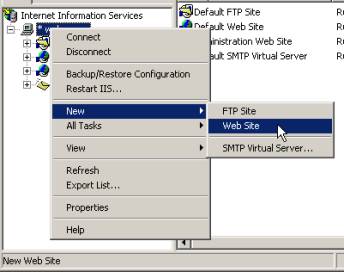
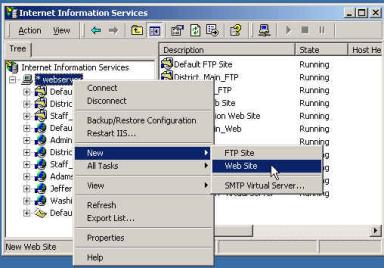
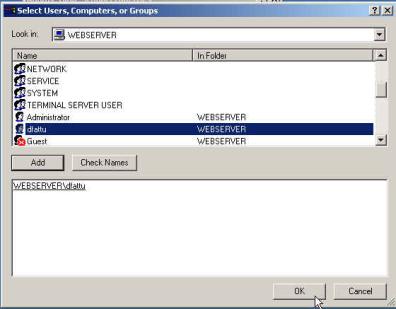
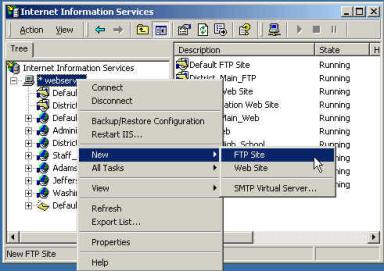
6.
Internet Information Service window: Place the mouse over the *webserver: right
mouse button click, choose New.
Click on Web Site. |
|
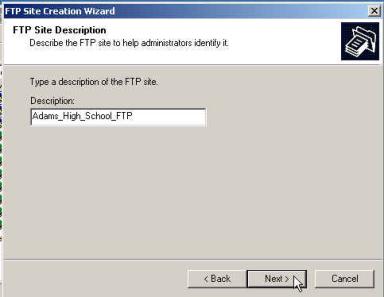
|
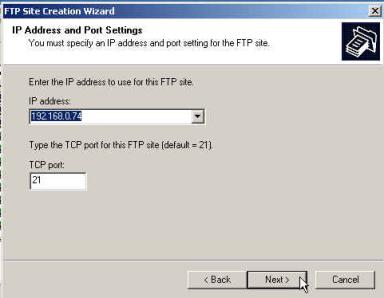
|
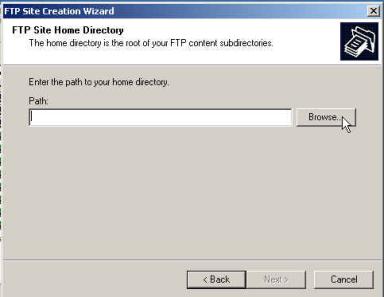
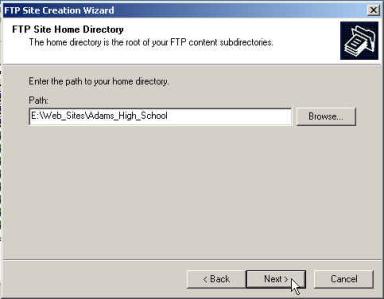
|
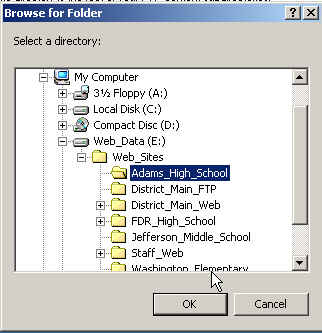
|
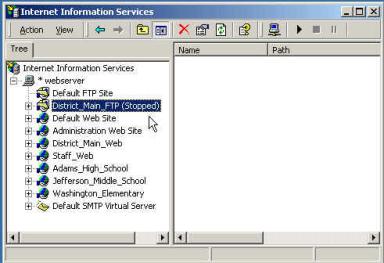
|
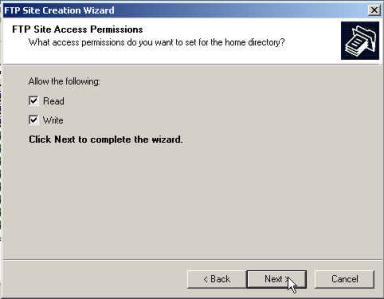
|
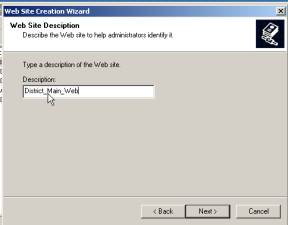
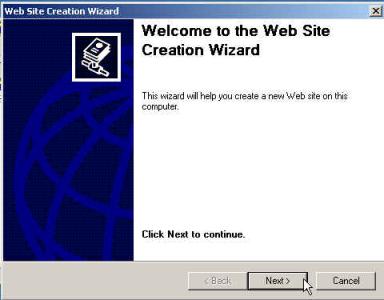
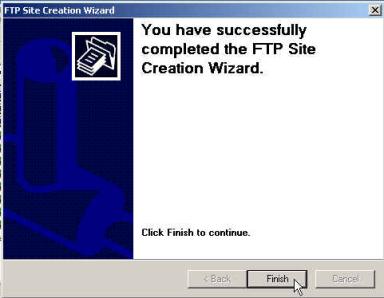
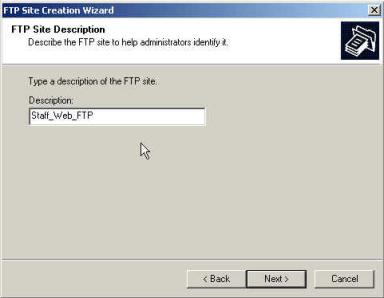
7.
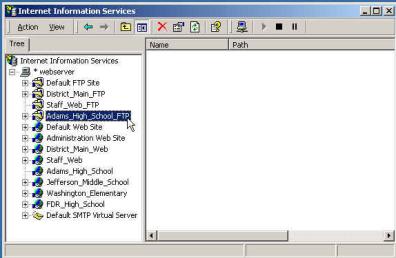
Web Site Creation Wizard / Web
Site Description window:
Type District_Main_Web in
the description field. Click Next. |
|
|
|
||
|
|
||

|
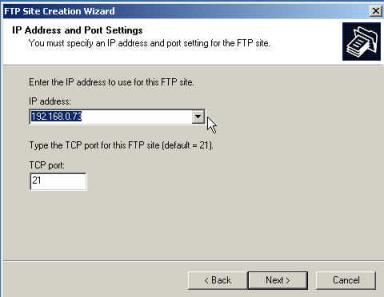
|
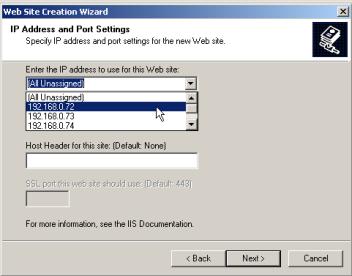
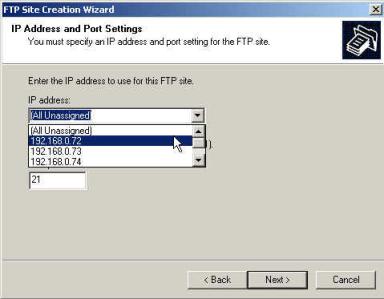
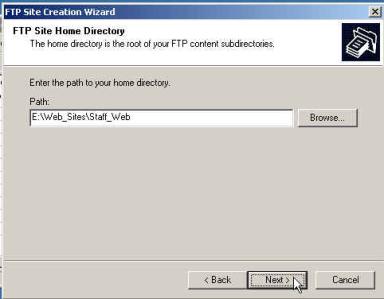
8.
Web Site Creation Wizard / IP
Address and Port Settings window: By default, Internet Information Server
(IIS) will assign a web site to (All Unassigned). Click the down arrow and choose the IP that is assigned to this
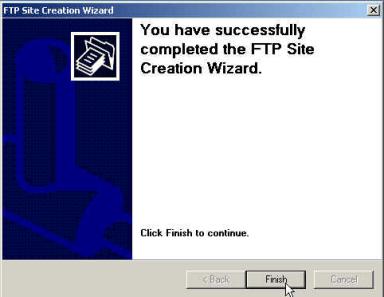
web site in the DNS. Click Next. |
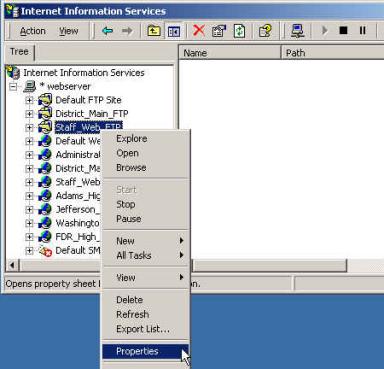
|
|
|
|
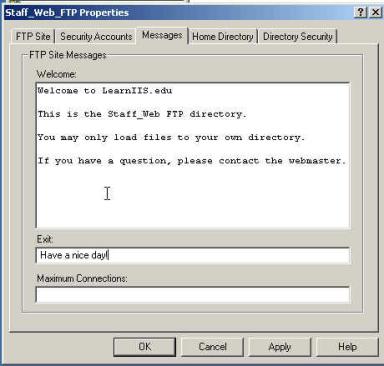
|
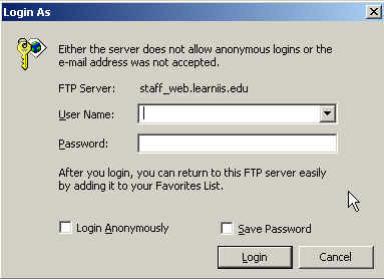
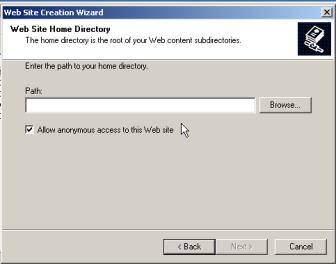
9.
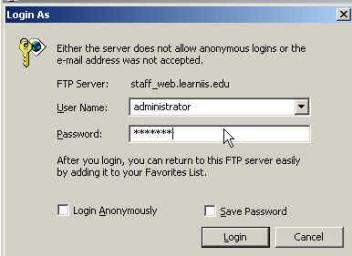
Web Site Creation Wizard / Web
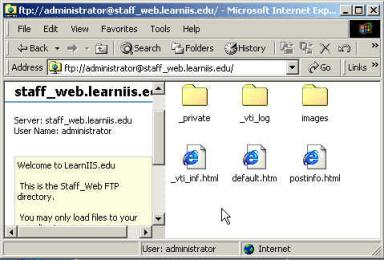
Site Home Directory window: You may type the actual path to the web
site directory. However, to lessen
the possibility of making a pathing mistake, click the Browse button. |
|
|
|

|
|
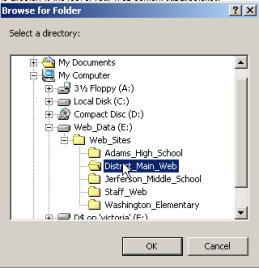
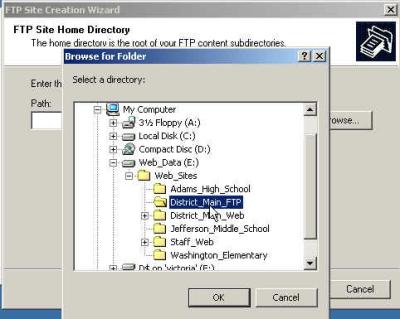
10.
Browse for Folder window: Click the plus sign to the left of
the Web_Data drive (E).
Continue to click the plus sign until you have reached the
District_Main_Web. Select the folder
by clicking it. Click OK. |
|
|
|
|
|
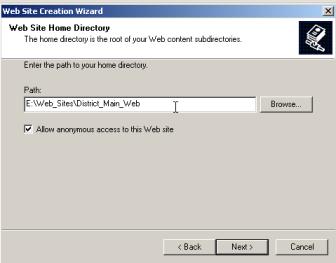
11.
Web Site Creation Wizard / Web
Site Home Directory window: The path to the web site will now display
in the path field. Click Next.
|
|
|
|
|
|
12.
Web Site Creation Wizard / Web
Site Access Permissions window. By default, Read and Run scripts (Such
as ASP) boxes are checked. Click Next. |
|
|
|
|
|
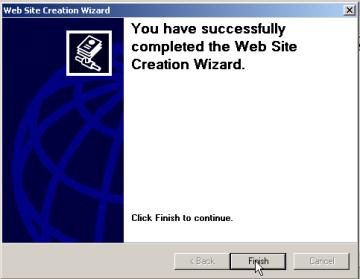
13.
Web Site Creation Wizard / You
have successfully completed the Web Site Creation Wizard window: Click Finish. |
|
|
|


|
|
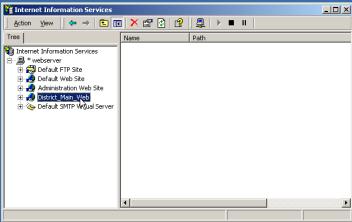
14.
Internet Information window:
This window will now display the District_Main_Web site. |
|
|
|
|
|
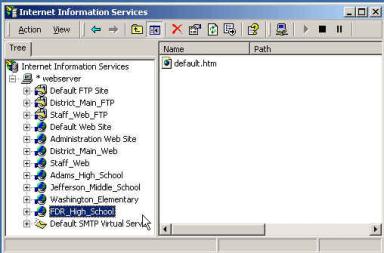
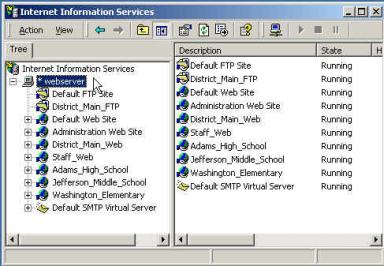
15.
Internet Information window:
When you have finished adding all the web sites, the Internet Information
Service window will display all your web sites. Do not close the Internet Information Services
window. |
|
|
|
|
|
|


Configuring Internet Explorer |
In the next section, you will test you IIS server to ensure it is serving the web pages you have loaded. It is necessary to configure Internet Explorer before it will be possible to view these pages. Complete the following steps: 16.
Double click the icon that reads Connect
to the Internet on your desktop. |
|
|
|
|
|
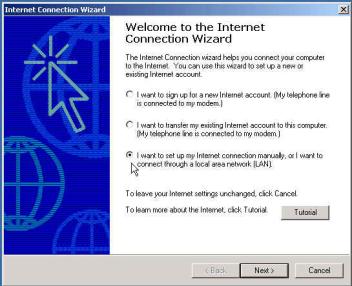
17.
Internet Connection Wizard / Welcome
to the Internet Connection Wizard window: Select the radio button
next to the text that reads: I want
to set up my Internet connection manually, or I want to connect through a
local area network (LAN). Click Next. |
|
|
|

|
|
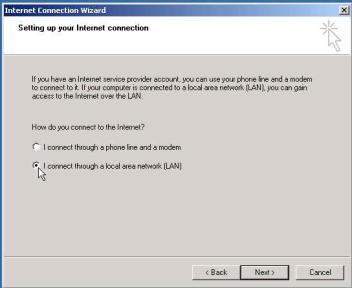
18.
Internet Connection Wizard / Setting
up your Internet connection window: Select the radio button next to
the text that reads: I connect through a local area network (LAN). Click Next. |
|
|
|
|
|
19.
Internet Connection Wizard / Local
area network Internet configuration window: Select the check box next
to the text that reads: Automatic discovery of proxy server
(recommended). Click Next. |
|
|
|
|
|
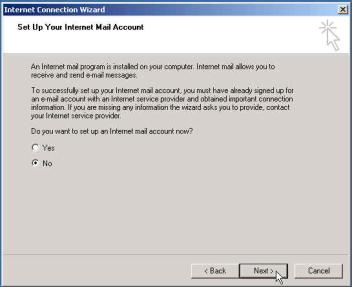
20.
Internet Connection Wizard / Set
Up Your Internet Mail Account window: Select the radio button next to
the text that reads No. Click Next. |
|
|
|

|
|
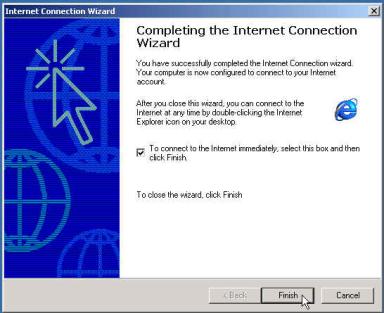
21.
Internet Connection Wizard / Completing
the Internet Connection Wizard window: Select the check box next to
the text that reads: To connect to the Internet immediately, select
this box and then click Finish. Click Next. |
|
|
|
|
|
|
|
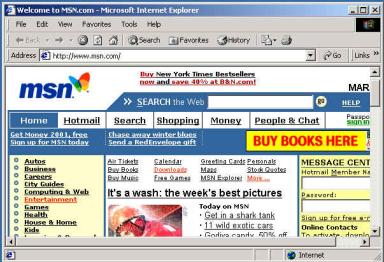
22.
Welcome to MSN.com – Microsoft Internet Explorer window: This screen or a similar web site will
appear on your monitor. |
|
|
|
|
|
|
|
|
|
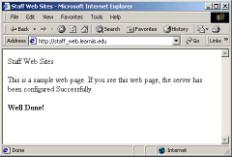
Testing your MS Internet Information Server |
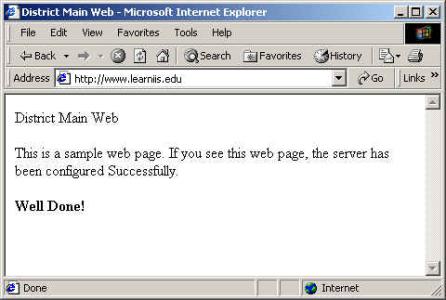
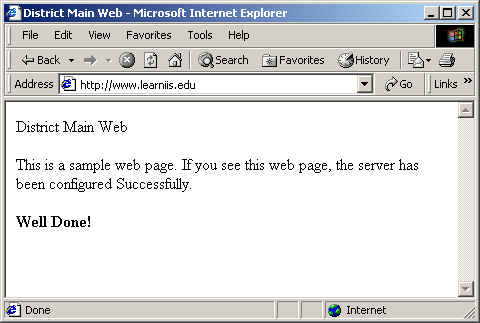
23.
Internet Explorer window: Test you web server to be certain it is
serving out web pages. If your DNS
has been configured properly, you will see the sample page appear in your web
browser. |
|
|
|
|
|
|
|
||
|
|
|
|
|
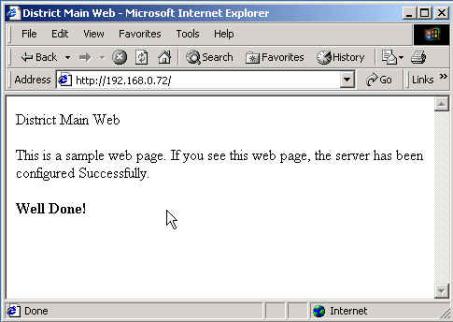
24.
Internet Explorer window: Continue this process to ensure all
web sites are working properly. |
|
|
|
|
|
|
|
|
|
|
|
|
|
|
|
Configuring FrontPage Extensions |
|
|
|
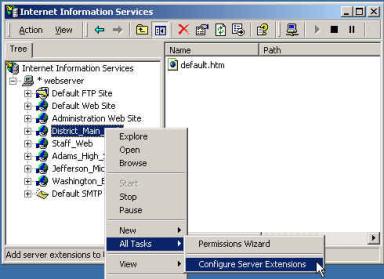
25.
Internet Information Service window: Place the pointer over the
District_Main_Web. |
|
|
|
|
|

|
|
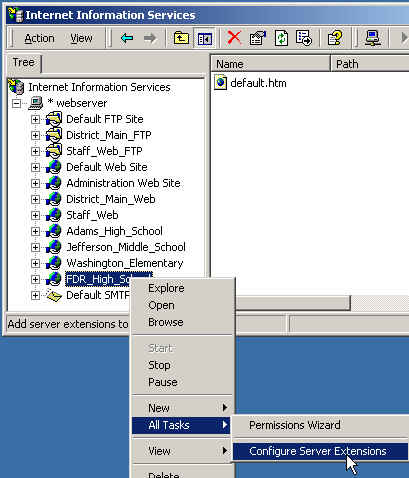
26.
Internet Information Service window: Click the right mouse button, choose All
Task, and click Configure Server Extensions. Click Next. |
|
|
|
|
|
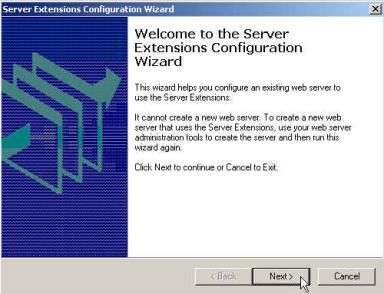
27.
Server
Extensions Configurations Wizard / Welcome to the Server
Extensions Configuration Wizard window: Click Next. |
|
|
|

|
|
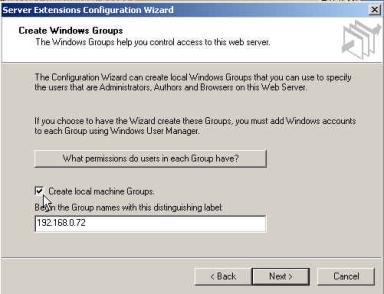
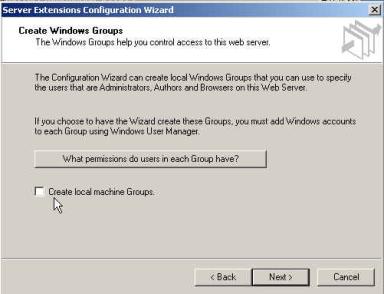
28.
Server
Extensions Configurations Wizard / Create Windows Groups
window: Place the pointer over the Create local machine group check
box. Remove the check by clicking in
the box. |
|
|
|
|
|
29.
Server
Extensions Configurations Wizard / Create Windows Groups
window: The check in the box next to
Begin the Group names with this
distinguishing label has been removed.
Click Next. |
|
|
|
|
|
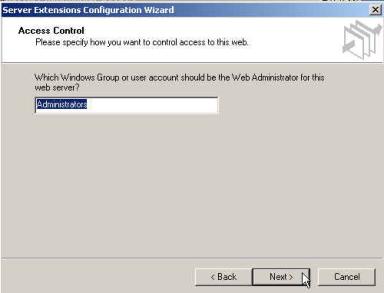
30.
Server
Extensions Configurations Wizard / Access Control window: Click Next. |
|
|
|
|
|
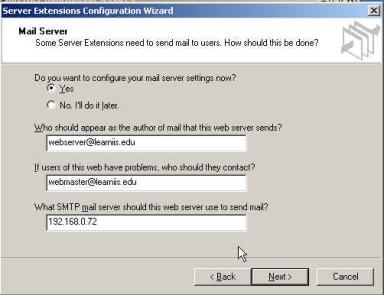
31.
Server
Extensions Configurations Wizard / Mail Server
window: This window contains three
fields, which require attention. By
default the Who should appear… and If users of this… fields will display the server name@IP_Address and webmaster@IP_Address. This window displays webserver@192.168.0.72 and webmaster@192.168.0.72 in these
fields. In this example, the field
has been changed to webserver@learniis.edu. This address will be displayed in the from
field in e-mail sent from a web form on this server. |
|
|
|
|
|
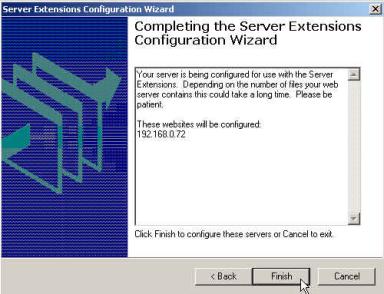
32.
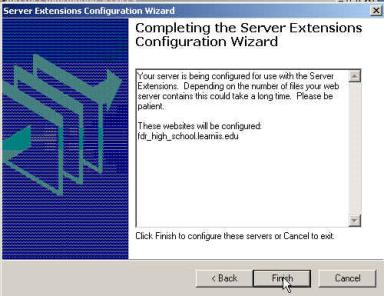
Server
Extensions Configurations Wizard / Competing the Server extensions
Configuration Wizard window: |
|
|
|
|
|
33.
Internet Information Service window:
will display without any changes. |
|
|
|
|
|
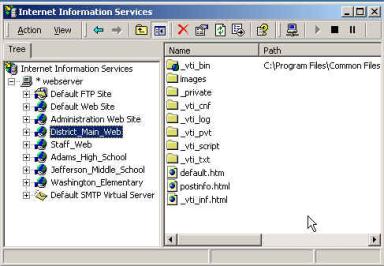
34.
Internet Information Service window:
Place the pointer over Action, left mouse button click. Click Refresh. |
|
|
|
|
|
35.
Internet Information Service window: Notice several new folders and files have appeared in the
right frame of this window. It is important not to delete these new items. |
|
|
|

|
|
Creating a New Web using Host Headers |
|
|
|
Host Headers will only work in conjunction with Domain
Name Server (DNS) If you intend to utilize Host Headers, you will have to
configure them when the server is placed in production mode. 36.
Internet Information Service window: Place the mouse over the *webserver,
right mouse button click, choose New, click Web Site. |
|
|
|
|
|
|
|
37. Web Site Creation Wizard / Welcome to the Web Site Creation Wizard window: Click Next. |
|
|
|
|
|
|
38.
Web
Site Creation Wizard / Web Site Description window: Type FDR_HIGH_SCHOOL in
the description field. Click Next. |
|
|
|
|
|
39.
Web
Site Creation Wizard / IP Address and Port Settings
window: By default Internet
Information Server (IIS) will assign a web site to (All Unassigned). Leave the IP address set to All Unassigned. Type the domain name
(Example: fdr_high_school.learniis.edu) in the Host Header for this site field. |
|
|
|
|
|
40.
Web
Site Creation Wizard / Web Site Home Directory window: You may type the actual path to the
web site directory. However, to
lessen the possibility of making a pathing mistake, click the Browse
button. |
|
|
|
|
|
41.
Browse for Folder window:
Click the plus sign to the left of the Web_Data drive (E). Continue to click the plus sign until you
reached the FDR_HIGH_SCHOOL. Select
the folder by clicking on it. Click OK. |
|
|
|


|
|
42.
Web
Site Creation Wizard / Web Site Home Directory window:
The path to the web site will now display in the path field. Click Next. |
|
|
|
|
|
43.
Web
Site Creation Wizard / Web Site Access Permissions
window: By default, Read and Run scripts (Such as ASP) boxes are
checked. Click Next. |
|
|
|
|
|
44.
Web
Site Creation Wizard / You have successfully completed the Web
Site Creation Wizard window: Click Finish. |
|
|
|
|
|
45.
Internet Information window:
This window will now displays the new web site. |
|
|
|
|
|
46.
Internet Information Services window:
Click the right mouse button, choose All Task: and click Configure
Server Extensions. |
|
|
|
|
|
47.
Server
Extensions Configurations Wizard / Welcome to the Server
Extensions Configuration Wizard window: Click Next. |
|
|
|
|
|
48.
Server
Extensions Configurations Wizard / Create Windows Groups
window: Place the pointer over the Create
local machine group check box.
Remove the check by left mouse clicking in the box. Click Next. |
|
|
|

|
|
49.
Server
Extensions Configurations Wizard / Create Windows Groups window:
The check in the box next to Begin the
Group names with this distinguishing label has been removed. Click Next. |
|
|
|
|
|
|
|
50.
Server
Extensions Configurations Wizard / Access Control window:
Click Next. |
|
|
|
|
|
|
|
51.
Server
Extensions Configurations Wizard / Mail Server window:
Type the first IP address bound to your Network
Interface Card in the What SMTP Mail
server… field. Note: This would be the first IP address
entered. This example displays
192.168.0.72 Click Next. |
|
|
|
|
|
|
|
52.
Server
Extensions Configurations Wizard / Competing the Server extensions
Configuration Wizard window: |
|
|
|
|
|
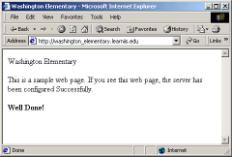
Testing the Host Header Web Site |
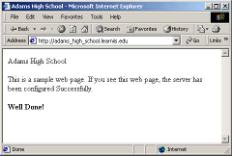
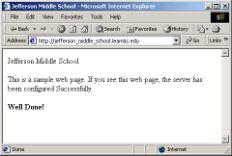
53.
Internet Explorer window:
Test you web server to be certain it is serving out web pages. If your DNS has been configured properly,
you will see the sample page appear in your web browser. |
|
|
|
|


|
|
Configuring SMTP Mail |
Configuring the SMTP Mail Pass Through |
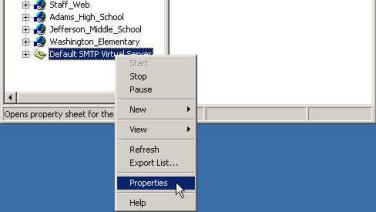
54.
Internet Information Services window:
Place the pointer over Default SMTP Virtual Server. |
|
|
|

|
|
55.
Internet Information Services window:
Click the Right mouse button. Choose Properties
and click. |
|
|
|
|
|
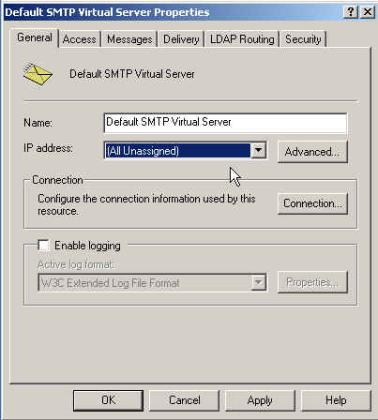
56.
Default SMTP Virtual Server Properties / General
tab: Locate the IP address field. Click the down
arrow. Choose the first IP address on the list and click. Note: You must use the same IP address used
the SMTP filed when you configured the Server Extensions. |
|
|
|
|
|
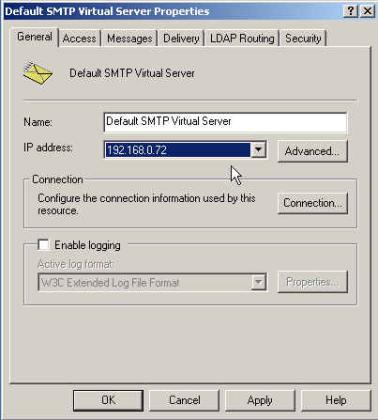
57.
Default SMTP Virtual Server Properties /
General tab: The IP address field will now displays the IP address you
selected. (Note: It is important
that this IP address matches the IP address used when configuring the Server
Extensions.) |
|
|
|
Securing SMTP Mail |
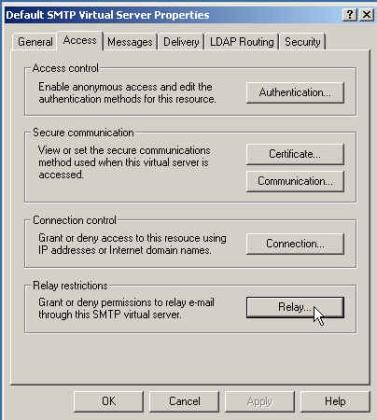
58.
Default SMTP Virtual Server Properties /
Access tab: Click the Relay
button located towards the bottom of this window. |
|
|
|
|
|
|
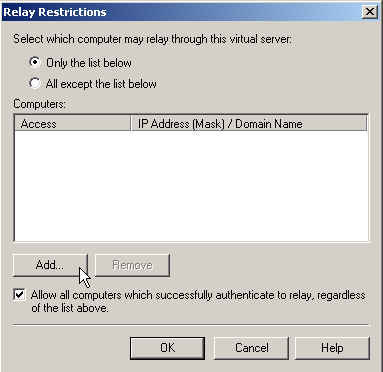
59.
Relay Restrictions
window: Ensure the radio button to the left of Only the list below is selected.
Click Add… |
|
|
|
|
|
60.
Computer window: Ensure the radio to
the left of Single computer is
selected. Type IP address of this
machine. (This will be the same IP
used in the SMTP Virtual Sever.)
Click OK. |
|
|
|
|
|
61.
Relay Restrictions window. The words Granted along with the IP
address will display in Computers area of this window. Click Ok. |
|
|
|
|
|
62.
Default SMTP Virtual Server Properties /
Access tab. Click Apply. Click Ok. |
|
|
|
|
|
63.
Internet Information Services window:
SMTP has been configured. |
|
|
|
|
|
Configuring FTP Sites |
|
|
|
In a perfect scenario,
every web master posting to the District Web Server would use a Microsoft web
page design product and a Windows base workstation to fully utilize the
convenience of the FrontPage Server Extensions. Unfortunately, this is not
the case. Many school districts and
teachers own and use web design products on computers, which do not run
Windows based programs. For those
users, it is necessary to configure FTP access to the web server. In the following sections, you will create a Public FTP site for the District, A private FTP site for on of the High School and private FTP site for a staff member under the Staff_Web site. |
|
Configuring the District
Public FTP Site
|
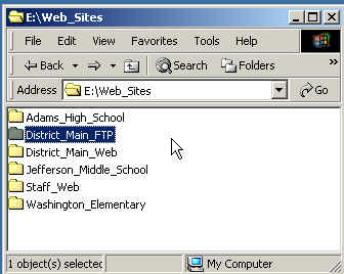
64. Open the Web_Sites folder located on the Web_Data
(E) drive. Create a folder and
name it District_Main_FTP. Create
a Read_me file or copy the supplied Read_Me file into this folder. |
|
|
|
|
|
|
|
|
|
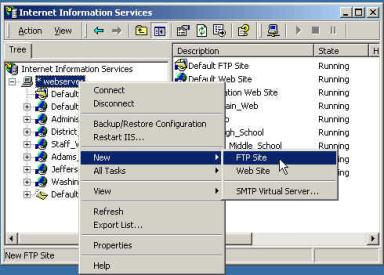
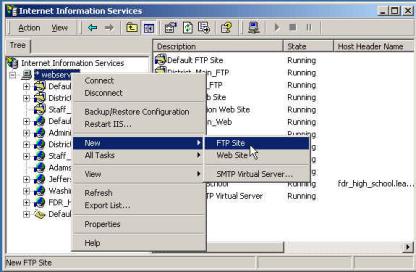
65.
Internet Information Services
window: Place the pointer over *webserver.
Click the right mouse button, choose New, click FTP Site. |
|
|
|
|
|
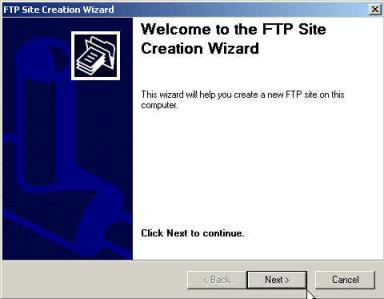
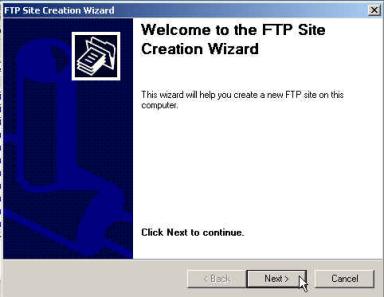
66.
FTP
Site Creation Wizard / Welcome to the FTP Site Creation Wizard window: Click Next. |
|
|
|
|
|
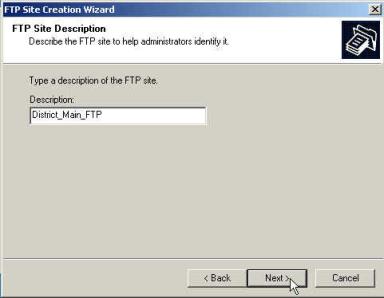
67.
FTP
Site Creation Wizard / FTP Site Description window: Type District_Main_FTP in
the Description field. Click Next. |
|
|
|
|
|
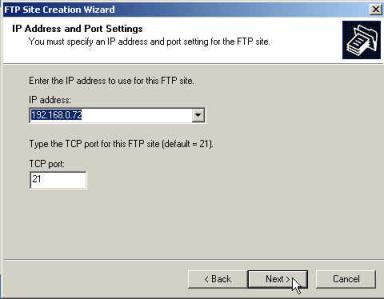
68.
FTP
Site Creation Wizard / IP Address and Port Settings window: Click the down arrow in the IP Address field. Choose the first IP address on the list.
This should match the IP address assigned to the District Main Web site. Click Next. |
|
|
|
|
|
69.
FTP
Site Creation Wizard / FTP Home Site Directory window: Click the Browse button. Click OK. |
|
|
|
|
|
70.
Browse for Folder
window: Click the Plus sign next to Web_Data drive. Continue this until you locate the District_Main_FTP
folder. Choose this folder by
clicking on it. Click Ok. |
|
|
|
|
|
71.
FTP
Site Creation Wizard / FTP Home Site Directory window: Click Next. |
|
|
|
|
|
72.
FTP
Site Creation Wizard / FTP Site Access Permission window: Make certain the check box next to Read is checked and Write does not contain a check. Click Next. |
|
|
|
|
|
73.
FTP
Site Creation Wizard / You have successfully completed the FTP
Site Creation Wizard window:
Click Finish. |
|
|
|
|
|
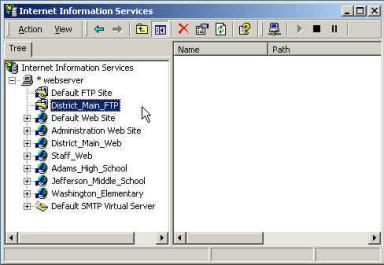
74.
Internet Information Services window: The District_Main_FTP server is
displayed. Place the pointer over the
District_Main_FTP site. |
|
|
|
|
|
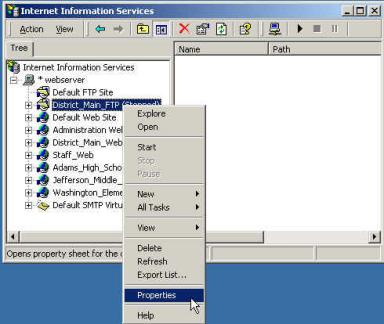
75.
Internet Information Services window: Click the right mouse button, choose Properties
and click. |
|
|
|
|
|
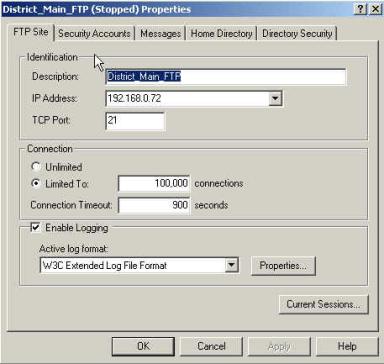
76.
District_Main_FTP /
FTP Site tab. Click the Security
Accounts tab. |
|
|
|
|
|
77.
District_Main_FTP /
Security Accounts tab.
Ensure the check boxes for Allow
Anonymous Connections and Allow IIS
to control Password each contain a check. Click the Messages tab. |
|
|
|

|
|
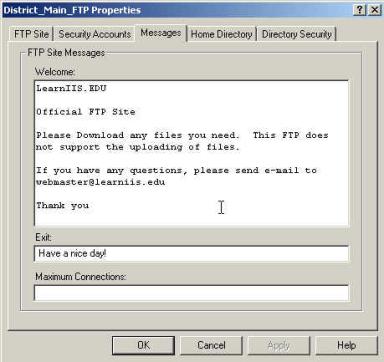
78.
District_Main_FTP /
Messages tab. Type Welcome to My District Public
FTP. In the Welcome field and Thank
you in the Exit Field. Click Apply and click Ok. |
|
|
|
|
|
79.
Internet Information Services window: Close this window. |
|
|
|
|
|
80.
Launch your web browser. Type the URL to
your main web site replacing HTTP:// with FTP://. The Read_Me.txt file should be visible. The welcome message should also be visible
in the left side of the window. |
|
|
|
|
|
|

Configuring a School FTP Site |
In this section, you will create a private FTP site for Adams High School. This FTP site will be configured so only David Fattu user name dfattu will have access to the FTP site. |
|
|
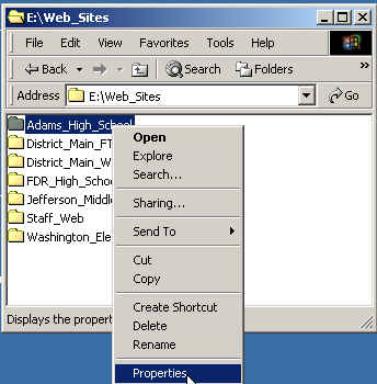
81.
E:\Web_Sites window: Open the Web_Sites folder located on the
Web_Data (E) drive. Place the pointer
over the Adams_High_School folder.
Click the right mouse button, choose Properties. |
|
|
|
|
|
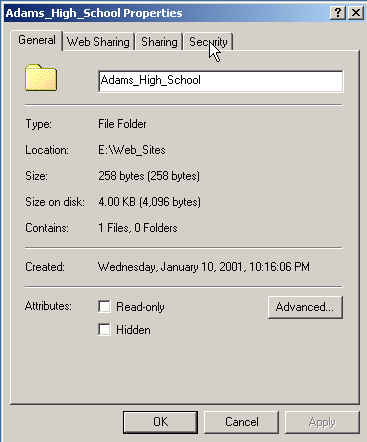
82.
Adams_High_School Properties
window: Click the Security tab. |
|
|
|
|
|
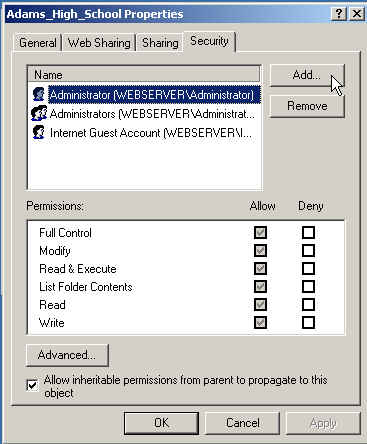
83. Adams_High_School Properties / Security tab: Click Add… |
|
|
|
|
|
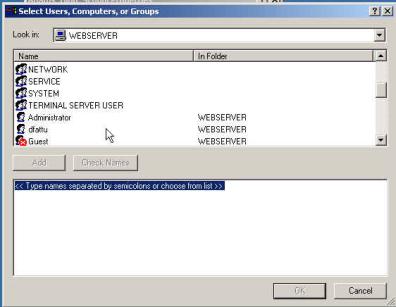
84.
Select Users, Computers, or Groups window:
Scroll this window, locate dfattu. |
|
|
|
|
|
85.
Select Users, Computers, or Groups window:
Select dfattu, click Add click OK. |
|
|
|
|
|
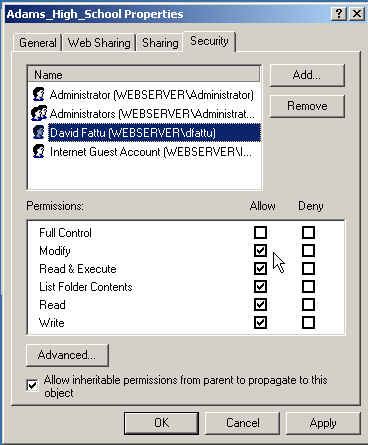
86.
Adams_High_School Properties / Security
tab: Select David Fattu, click the check box next to Modify under Allow.
Click Apply click OK. |
|
|
|
|
|
87.
Internet Information Services
window: Place the pointer over *webserver.
Click the right mouse button, choose New, click FTP Site. |
|
|
|
|
|
|
|
|
88.
FTP
Site Creation Wizard / Welcome to the FTP Site Creation Wizard window: Click Next. |
|
|
|
|
|
89.
FTP
Site Creation Wizard / FTP Site Description window: Type Adams_High_School_FTP in
the Description field. Click Next. |
|
|
|
|
|
90.
FTP
Site Creation Wizard / IP Address and Port Settings
window: Click the down arrow
in the IP Address field. Choose the first IP address on the list.
This should match the IP address assigned to the District Main Web site. Click Next. |
|
|
|
|
|
91.
FTP
Site Creation Wizard / FTP Home Site Directory window: Click the Browse button. Click OK. |
|
|
|
|
|
92.
Browse for Folder
window: Click the Plus sign next to Web_Data drive. Continue this until you locate the Adams_High_School_FTP
folder. Choose this folder by
clicking on it. Click Ok. |
|
|
|
|
|
93.
FTP
Site Creation Wizard / FTP Home Site Directory window: Click Next. |
|
|
|
|
|
94.
FTP
Site Creation Wizard / FTP Site Access Permission window: Make certain the check box next to Read and Write is checked. Click Next. |
|
|
|
|
|
95.
FTP
Site Creation Wizard / You have successfully completed the FTP
Site Creation Wizard window:
Click Finish. |
|
|
|
|
|
96.
Internet Information Services window: The Adams_High_Schoo_FTP server is
displayed. Place the pointer over the
Adams_High_School_FTP site. |
|
|
|
|
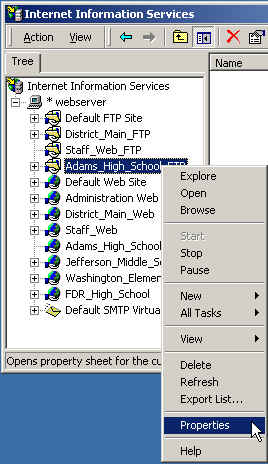
|
97.
Internet Information Services window: Click the right mouse button, choose Properties
and click. |
|
|
|
|
|
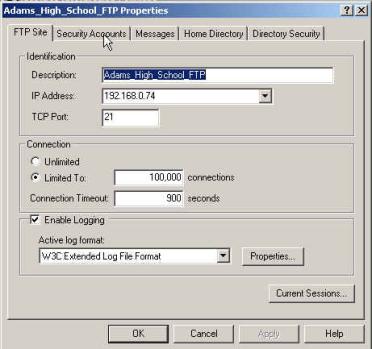
98.
Adams_High_School /
FTP Site tab. Click the Security
Accounts tab. |
|
|
|
|
|
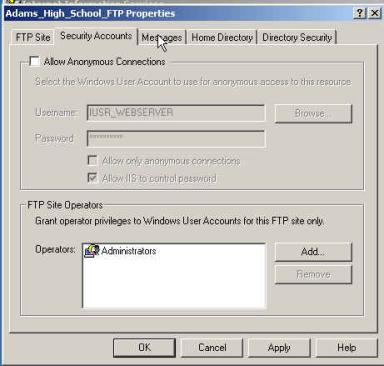
99.
Adams_High_School /
Security Accounts tab.
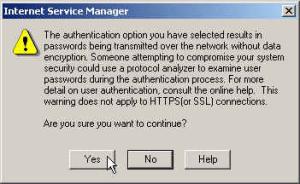
Remove the check boxes for Allow
Anonymous Connections. |
|
|
|

|
|
100.
Internet Service Manager
window: Click Yes. |
|
|
|
|
|
|
101.
Adams_High_School / Security Accounts tab. Click the Messages tab. |
||
|
|
|
|
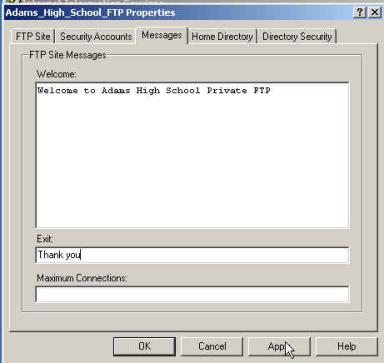
102.
District_Main_FTP /
Messages tab. Type Welcome to Adams High School
Private FTP. In the Welcome field and Thank
you in the Exit Field. Click Apply and click Ok. |
|
|
|
|
|
103.
Internet Information Services window: Close this window. |
|
|
|

Configuring the Staff Web FTP Site |
Configuring the Staff Web FTP site is similar to
configuring the Public FTP site with the exception of access. You will notice duplicate screen captures
along with new screen captures showing the different configurations in this
procedure. |
|
|
104.
Internet Information Service window:
Place the pointer over *webserver. |
|
|
|
|
|
105.
Internet Information Service window:
Click the right mouse button, choose New, and click FTP Site. |
|
|
|
|
|
106.
FTP
Site Creation Wizard / Welcome to the FTP Site Creation Wizard window:
Click Next.
|
|
|
|
|
|
107.
FTP
Site Creation Wizard / FTP
Site Description window. Type the Staff_Web_FTP In the description
field. Click Next. |
|
|
|

|
|
108. FTP
Site Creation Wizard / IP Address and Port Settings
window: Click the down arrow
in the IP Address field. Choose the IP address that Staff_Web
is assigned to. Click Next. |
|
|
|
|
|
109. FTP Site Creation Wizard / FTP
Home Site Directory window:
Click the Browse button.
|
|
|
|

|
|
110. FTP Site Creation Wizard / FTP
Home Site Directory window:
Click the Plus sign next to Web_Data drive. Continue this until you locate the
Staff_Web_FTP folder. Choose this
folder by clicking on it. Click Ok. |
|
|
|
|
|
111. FTP Site Creation Wizard / FTP
Home Site Directory window:
Click Next. |
|
|
|

|
|
112. FTP Site Creation Wizard / FTP
Site Access Permission window:
Make certain the check boxes next to Read and Write contains
a check. Click Next. |
|
|
|
|
|
113. FTP Site Creation Wizard / You
have successfully completed the FTP Site Creation Wizard window: Click Finish. |
|
|
|

|
|
114. Internet
Information Services window: Place the pointer over Staff_Web_FTP. Click the right mouse button, choose Properties
and click. |
|
|
|
|
|
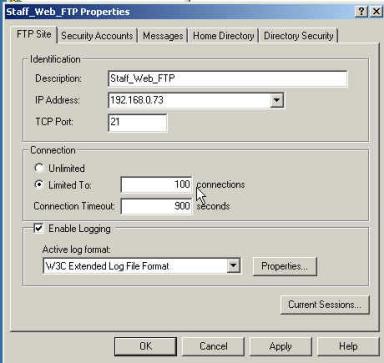
115. Staff_Web_FTP / FTP Site tab.
In the Connection area, set
the Limited To: field to 100
connections. Select the Security
Accounts tab. |
|
|
|
|
|
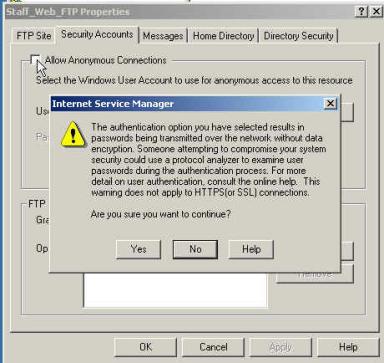
116. Staff_Web_FTP
window / Security Accounts tab. Remove the check boxes for Allow Anonymous Connections. When the check is removed, the Internet
Service Manger alert window will be displayed. Click the Yes
button to continue. |
|
|
|
|
|
|
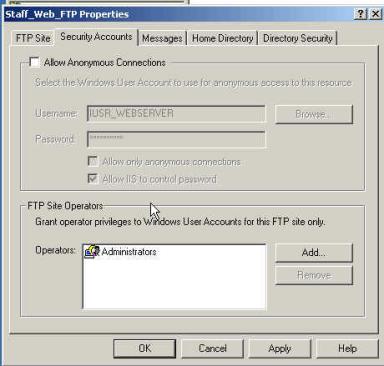
117. Staff_Web_FTP
window / Security Accounts tab. The Allow
Anonymous Connections check box will become grayed. Click the Apply button. Click the Messages tab. |
|
|
|
|
|
118. Staff_Web_FTP
window / Messages tab.
Type Welcome to the Staff_Web Private FTP site in
the Welcome field. Type Thank
you. In the Exit field. |
|
|
|
|
|
119. Launch
your web browser. Type the URL to
your staff_web site replacing HTTP:// with FTP:// (It may be necessary to use
the IP address). The Login As window will display. |
|
|
|
|
|
120. Login
As window. Type Administrator in the User Name field. Type the administrator
password in the password
field. Click Login. |
|
|
|
|
|
121. The
files contained in this folder should be visible. The welcome message should also be visible in the left side of
the window. Close the web
browser. |
|
|
|