Binding Multiple IP Address to the Network Interface Card
In Chapter 3 you will add additional IP addresses to your
server. These IP address will be added
to the Network Interface Card via a process known as binding. This process allows your web server to host
multiple web sites though each IP address.
Materials needed in this chapter
q
A list of IP addresses that will be used on your server
|
|
Binding Multiple IP Address to the Network
Interface Card
|
|
|
|
|
|
|
|
Note: You must log into the server as the administrator. |
|
|
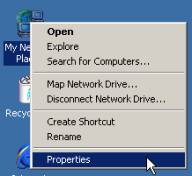
1.
Place the mouse over My Network Places.
Right mouse button click and choose Properties. |
|
|
|
|
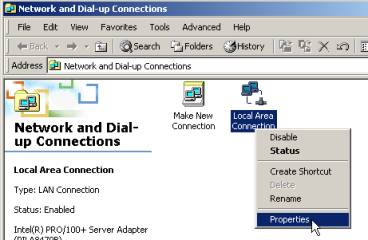
2.
Network
and Dial-up Connections window: Right mouse button click on Local Area
Connection. Click Properties. |
|
|
|
|
|
|
|
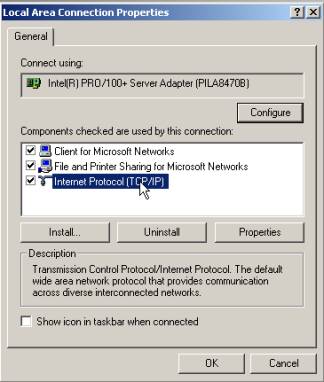
3.
Local
Area Connection window: Select Internet Protocol (TCP/IP). Click the Properties button. |
|
|
|
|
|
|
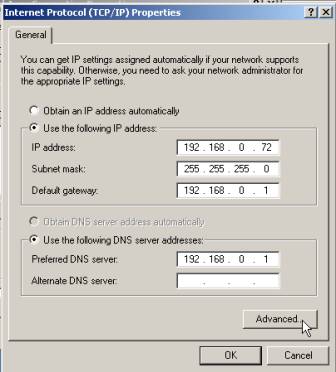
4.
Internet
Protocol (TCP/IP) Properties window: Click the radio button next to Use the following IP address: Type the
IP address, Subnet mask, default
gateway and DNS information for your
network. (See section: Information to gather before you begin.) Click the Advanced button. |
|
|
|
|
|
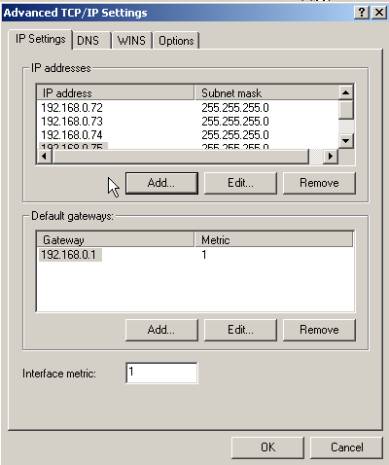
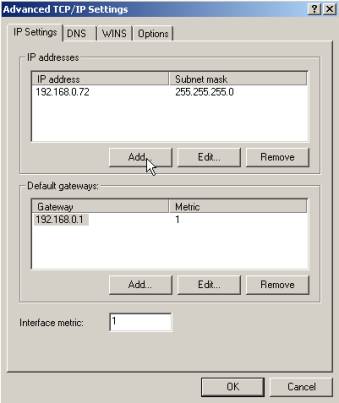
5.
Advanced
TCP / IP
Setting window: Click the Add button under the
IP Addresses section of this Window. |
|
|
|
|
|
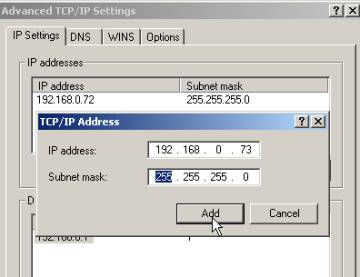
6.
Advanced
TCP / IP
Settings window: Type the IP address and subnet
mask in the appropriate fields. Click Add to complete
the process. |
|
|
|
|
|
7.
Advanced
TCP / IP Settings window: This window now displays the IP addresses
that have been bound to the NIC.
Note: if more than four IP addresses have been added to the NIC, it
will be necessary to scroll the window to see all the IP addresses. |
|
|
|
|
|
|