Configuring a Logical Hard Drive
In chapter 1, you created a small partition and installed
Windows 2000 server on this partition.
In chapter 2 you will create a partition using the remaining hard drive
space on your server. This partition
will hold the web data for your web site.
Once this partition is created, you will format the partition.
Materials needed in this chapter
q
No additional materials are needed
|
|
Configuring a Logical Hard Drive
|
|
|
|
|
|
Follow these instructions below to create and format a logical hard drive on your Windows 2000 Server. Note: You must log into the server as the administrator. The Configure Your Server window may open when you log on the machine. Close this window before you continue. |
Creating the Partition |
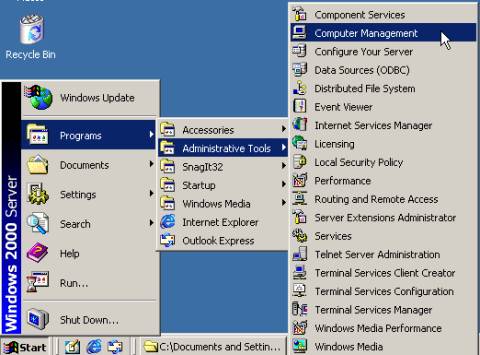
1.
Click Start, choose Programs, Administrative
Tools, and click on Computer Management. |
|
|
|
|
|
|
|
|
2.
Computer
Management window
will open. |
|
|
|
|
|
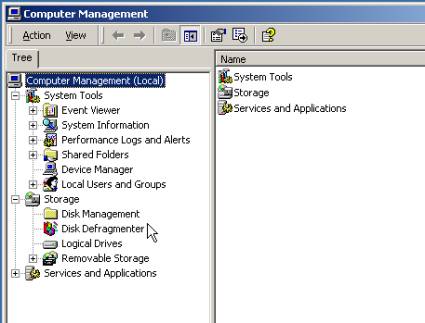
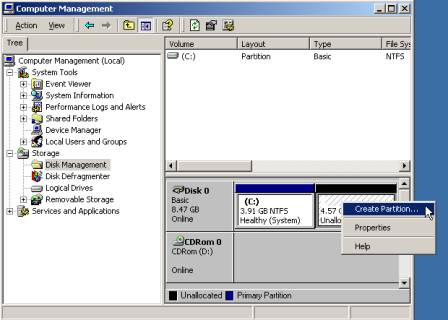
3.
Computer
Management window: Select the Disk Management folder
located under Storage. |
|
|
|
|
|
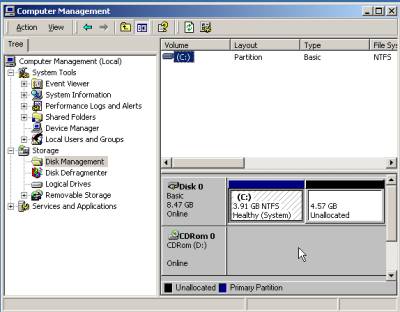
4.
Computer
Management window: Place the pointer over the Unallocated drive. Right mouse button click and choose Create
Partition. |
|
|
|
|
|
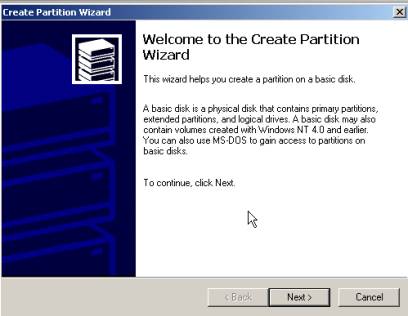
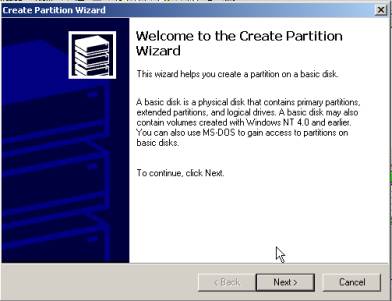
5.
Create
Partition Wizard / Welcome
to the Create Partition Wizard window: Click Next. |
|
|
|
|
|
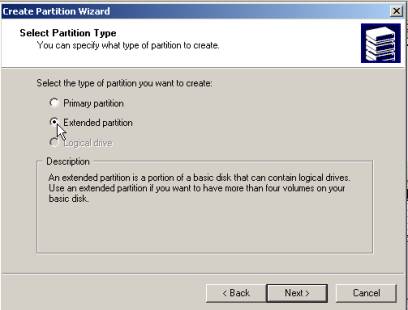
6.
Create
Partition Wizard / Select Partition Type window: Click the radio button next to Extended partition. Click Next. |
|
|
|
|
|
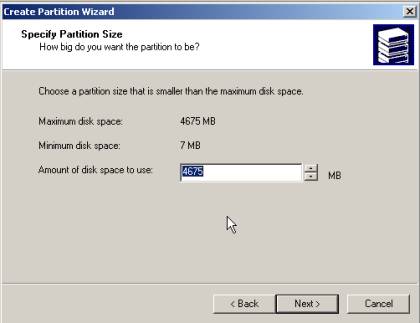
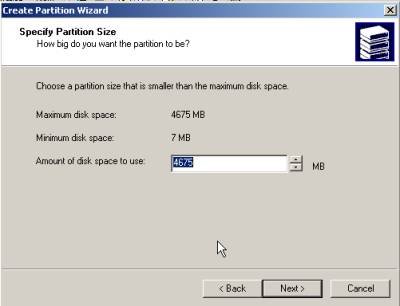
7.
Create
Partition Wizard / Specify Partition Size window: By default, Windows will use all the
available hard disk space to create a single partition. While it is possible to create multiple
partitions, this example demonstrates creating one. Click Next. |
|
|
|
|
|
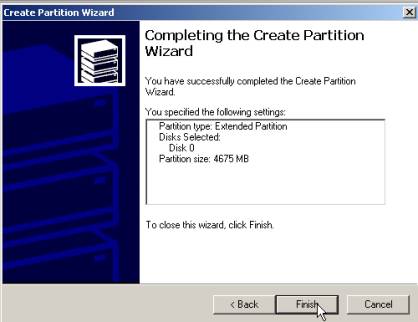
8.
Create
Partition Wizard / Completing the Create Partition Wizard window: Click Finish. |
|
|
|
|
|
|
|
9.
Computer
Management window: The partition will now be displayed. |
|
|
|
|
|
Formatting the Logical Drive |
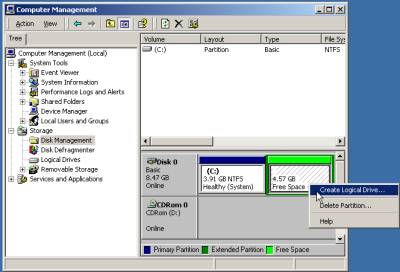
10.
Computer
Management window: Place the pointer over the new
partition. Right mouse button
click. Choose Create Logical Drive. |
|
|
|
|
|
|
|
11.
Create
Partition Wizard / Welcome to the Create Partition Wizard window: Click Next. |
|
|
|
|

|
|
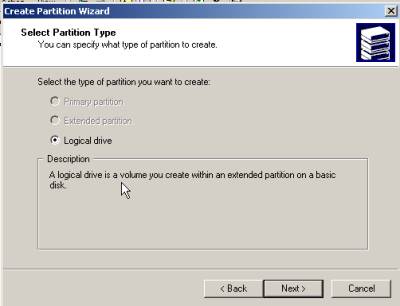
12.
Create
Partition Wizard / Select Partition Type window: Click
the radio button next to Logical drive.
Click Next. |
|
|
|
|
|
13.
Create
Partition Wizard / Specify partition Size window: It is possible to change the size of
the logical drive. This example will
use the default size. By default,
Windows will use all the available hard drive space. Click Next. |
|
|
|
|
|
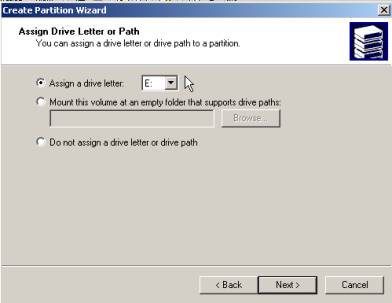
14.
Create
Partition Wizard / Assign Drive Letter or Path window: By default, Windows will assign the next
available drive letter to this new drive.
Clicking the down arrow and choosing a different drive letter can
override this default. Click Next. |
|
|
|
|
|
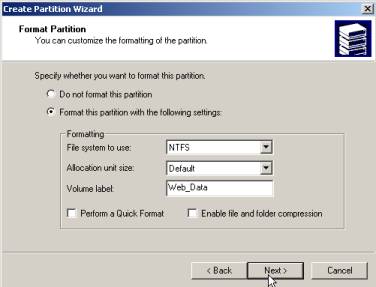
15.
Create
Partition Wizard / Format
Partition window: To fully utilize Windows 2000 security, this
logical partition should be formatted using NTFS file system. Leave the Allocation unit size to the default setting. Type Web_Data in
the Volume Label. Click Next. |
|
|
|
|
|
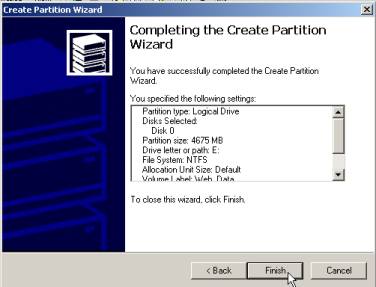
16.
Create
Partition Wizard / Completing the Create Partition Wizard window: Click Finish. |
|
|
|
|
|
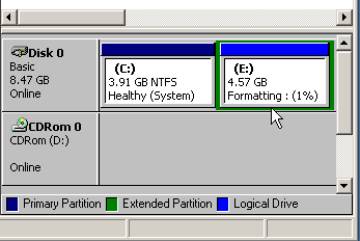
17.
Computer
Management window:
This step formats the logical partition.
Notice the percent completed shows in the new logical drive. |
|
|
|
|
|
18.
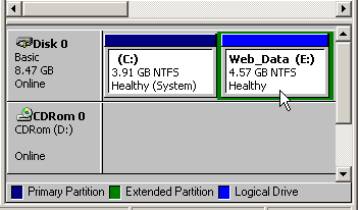
Computer
Management window: Windows has completed formatting the new
logical drive: the drive letter has been assigned along with the volume name. |
|
|
|
|
|
|