Installing Windows 2000 Server
Deleting hard disk partitions.
In this chapter you will complete the process of
installing Windows 2000 Server software on your server. This chapter assumes your server does not
contain an operating system or you wish to remove the current operating
system. Any data on the hard drive(s)
will be removed during this installation.
This chapter will not address any server specific
information. Please consult the
technical data included with your server.
Materials needed in this chapter
q
Drivers and utilities specific to your server (Drivers
should come with machine or contact the manufacturer.)
q
Windows 2000 Server CD
|
|
Installing Windows 2000 Server |
|
|
|
|
|
Follow the instructions below if the intended web server
is not pre-configured with Windows 2000 Server. |
|
|
|
|
|
1.
Place Windows 2000 Server CD in the CD ROM
drive and power up the server. a.
The installer will generate a series of Blue
Windows 2000 Installation screens while the Windows Operating System begins
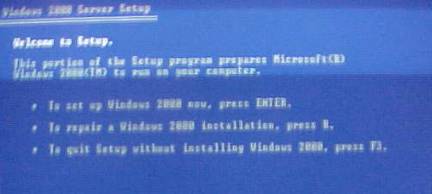
to install itself on the server. 2.
Windows
2000 Server Setup / Welcome screen: The software
installer will ask if you want to setup Windows 2000 now. Press the Enter Key. |
|
|
|
|
|
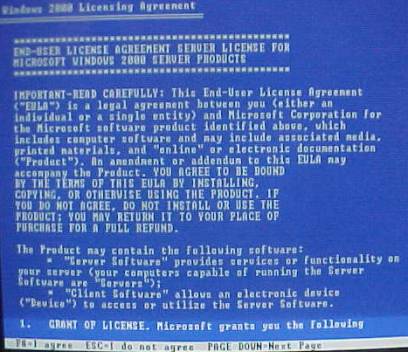
3.
At the next screen, please read the Windows
License Agreement. Press F8
when finished. |
|
|
|
|
|
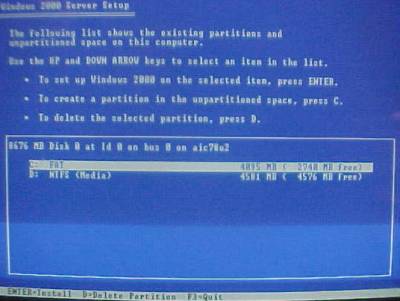
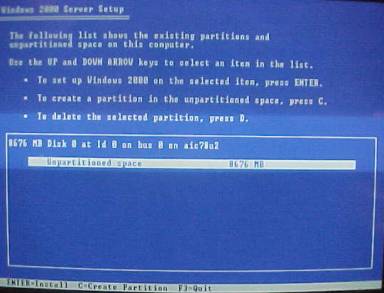
4.
Windows
2000 Server Setup / Partition Screen: With this step, it is possible to re-configure hard drive
partitions. This server will be
configured as a web server only.
Therefore, it is not necessary to create an Operating System (OS)
partition larger than 4 gigabytes.
(It is also not recommended to create the OS partition smaller than
2.5 gigabytes.) Press the D key to
delete any existing partitions. |
|
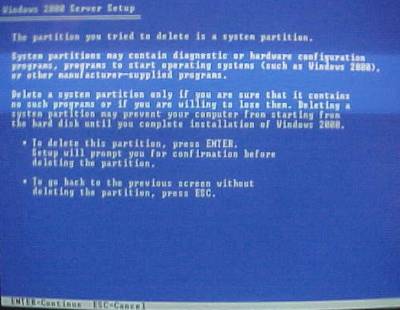
Deleting hard disk
partitions.
|
|
|
|
|
5.
Windows setup will confirm you wish to delete the
partitions. Press the Enter
key to confirm and continue. |
|
|
|
|
|
|
|
|
|
|
|
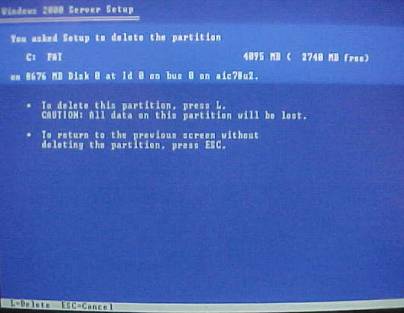
6.
In the next screen, Windows setup will ask you to
press the L key to delete the partitions. Press the L key at
this time. |
|
|
|
|
|
|
|
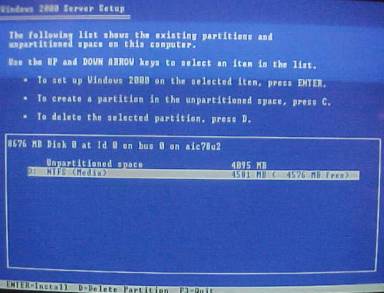
7. If the server contains more than one partition, the screen reappears, press the down arrow to select the other partition. Repeat steps four and five. When all partitions have been deleted proceed to steps four through 6. |
|
|
|
|
|
Creating Hard Disk
Partitions
|
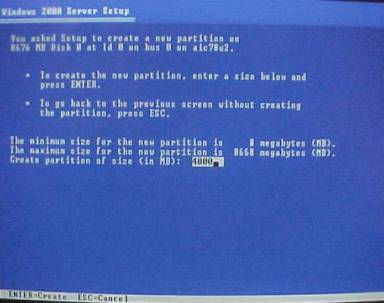
8.
Create a partition. Press the C key. |
|
|
|
|
|
|
|
9.
In this screen, type the size of
the partition you want the Windows installer to create. (4 gigabytes (4000MB)
is recommended) Press the Enter
key. |
|
|
|
|
|
|
|
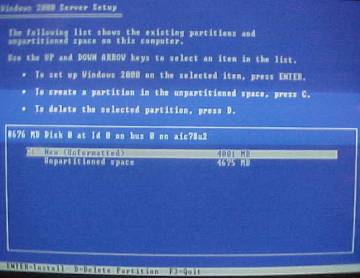
10.
This screen displays the new partition size. Press the Enter key to
install Windows. |
|
|
|
|
|
|
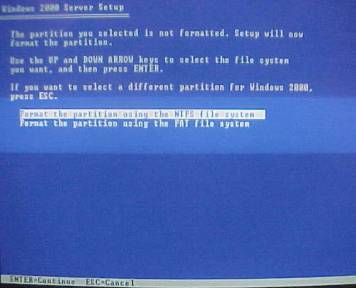
11.
This screen will ask you to choose which file
format to use when formatting the hard drive. NTFS is the default choice for Windows 2000. Press the Enter
key to continue. Once the Windows Installer formats the hard
drive, the installation of the operating system will begin. After the
operating system is copied to the server, the machine will reboot. Windows will continue the installation
process. This process may take up to thirty minutes. |
|
|
|
|
|
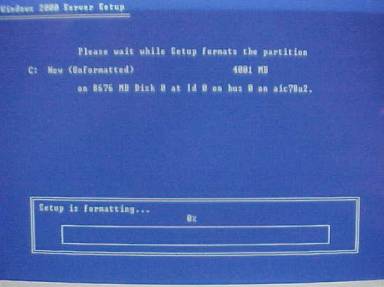
12.
This screen displays the format settings for the
hard drive along with the status of the formatting operation. |
|
|
|
|
|
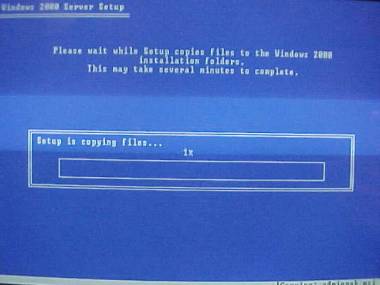
13.
This screen will show process of files being
copied to the hard drive. |
|
|
|
|
|
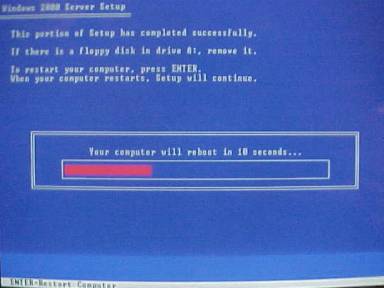
14.
Once Windows has copied the files to the hard
drive, the server will again reboot.
The server will display several screens during the reboot. |
|
|
|
Choosing Windows
Components
|
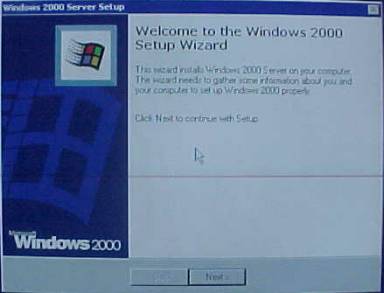
15.
Several screens will appear on the monitor as
Windows 2000 boots for the Components process. 16.
Windows
2000 Server Setup / Welcome to the Windows 2000 Setup Wizard window: |
|
|
|
|
|
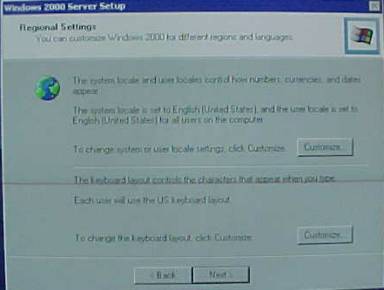
17.
Windows
2000 Server Setup / Regional Settings window: choose
the appropriate region for your Geographical Location. Click the Next button. |
|
|
|
|
|
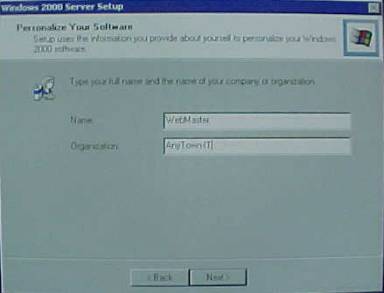
18.
Windows
2000 Server Setup / Personalize Your Software window:
In the Name field, type Your
Name. In the Operation
field, type My Organization. Click Next. |
|
|
|
|
|
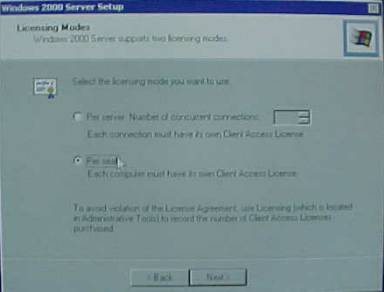
19.
Windows
2000 Server Setup / Licensing Modes window: Per Server Concurrent Settings Per Seat This will depend on your
licensing agreement. For this
tutorial, choose Per seat. Click Next. |
|
|
|
|
|
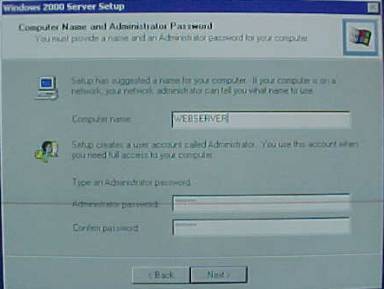
20.
Windows
2000 Server Setup / Computer Name & Administrator Password
window: Type WEBSERVER in the Computer Name field. Type
the administrator password in the Type
an administrator password field. Click Next. |
|
|
|
|
|
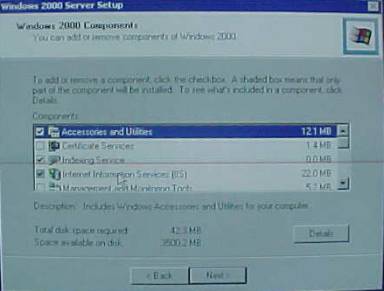
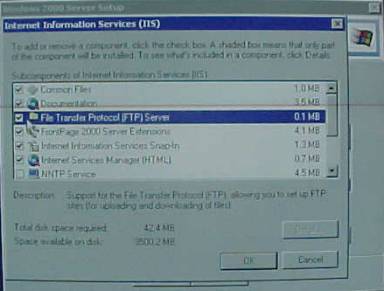
21.
Windows
2000 Server Setup / Windows 2000 Components window:
Windows 2000 server is extremely robust server software. The objective of this server, however,
will be to serve web pages. Scroll the component Box, locate Internet Information Service (IIS) and
Double click. Choose File Transfer Protocol (FTP) Server Click OK |
|
|
|
|
|
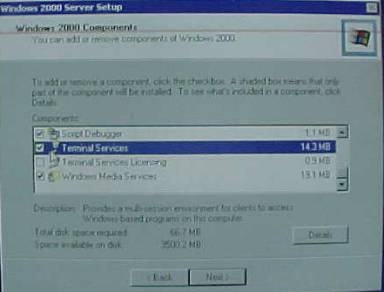
22.
Windows
2000 Server Setup / Windows
2000 Components window:
Scroll this window locate Terminal Service.
Click the check box located to the left of Terminal Service. Click Next. |
|
|
|
|
|
|
|
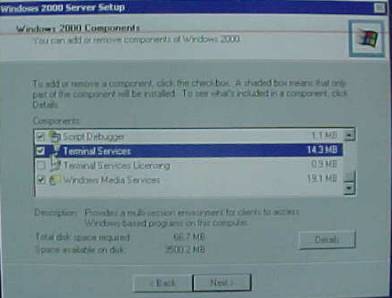
23.
Windows
2000 Server Setup / Windows
2000 Components window: *Scroll to Windows
Media Server. Click the check box located to the left of Windows Media
server. Click Next. |
|
|
|
|
|
24.
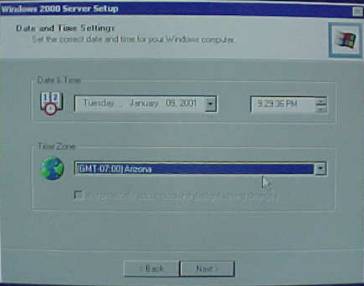
Windows
2000 Server Setup / Date
and Time settings window: Set
the correct Date and Time.
Choose the appropriate Time Zone for your location. Click Next. |
|
|
|
|
|
|
|
25.
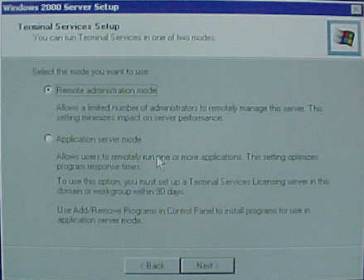
Windows
2000 Server Setup / Terminal
Service Setup window: Choose Remote Administration. Choosing this setting will allow the machine administrator to connect to the server from a remote computer. The remote computer will act as terminal for the Web server. (This will require the installation of the Terminal Server client software on the remote machine. This is covered later in this document.) Click Next. |
|
|
|
|
|
|
|
26.
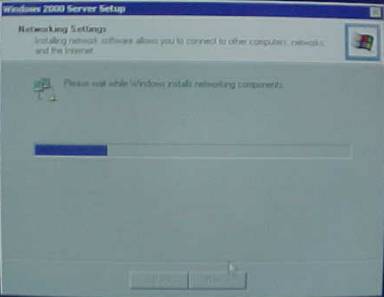
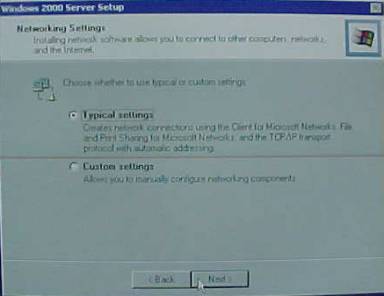
Windows
2000 Server Setup / Network
Settings window: Two windows appear. Click Next in the
first window. In the second window,
Click the Typical radio button,
click Next in the second window. |
|
|
|
|
|
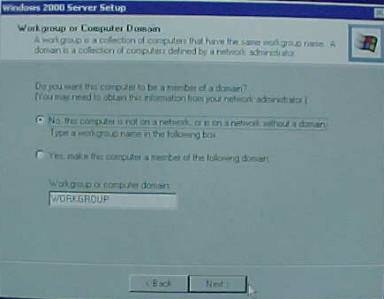
27.
Windows
2000 Server Setup / Work
Group or Domain window: use the default setting. Note: The default name for the
Workgroup is Workgroup. Click Next. |
|
|
|
||
|
|
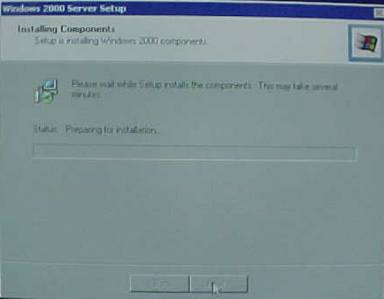
28.
Windows
2000 Server Setup / Installing
Components window: This screen displays the status of the
installation. |
|
|
|
|
|
|
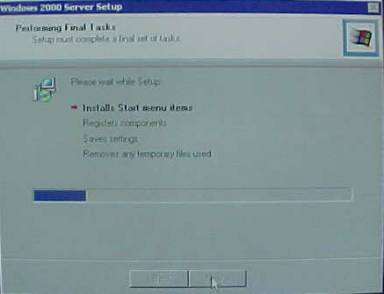
29.
Windows
2000 Server Setup / Performing
Final Task window: This window displays
the status of the installation. |
|
|
|
|
|
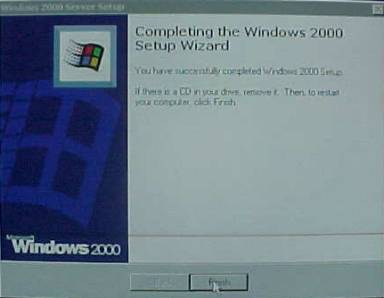
30.
Windows
2000 Server Setup / Completing
the Windows 2000 Setup Wizard
window: Windows
2000 Server setup is now complete.
Remove the Windows 2000 Server CD from the CD ROM drive. Click Finish. |
|
|
|
|
|
|